
Insulated Cooler Backpack
In this tutorial, we'll show you how to sew an insulated backpack that's perfect for picnics or bringing home frozen groceries. Pattern included!
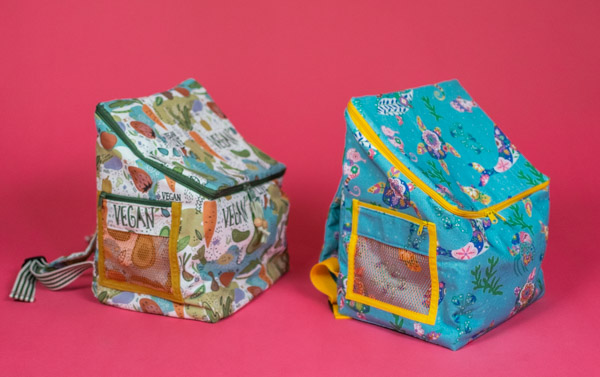
Project preview
This video is for members
Join Lulu Ferris to watch the complete class and sew along at your own pace.
What you’ll make
Sew an insulated cooler backpack for picnics or carrying frozen groceries. It has a roomy zippered compartment, padded adjustable straps, a top handle and a small side pocket.
An insulated middle layer helps maintain the temperature inside. A structured interior insert uses plastic panels to help the backpack hold its shape.
What you’ll learn in this class
- Join waterproof lining and insulated batting into one layer.
- Stabilize bias-cut edges before assembly.
- Sew a long zipper around the curved top opening.
- Create and bind a mesh-and-fabric side pocket.
- Construct padded straps with webbing and adjustable sliders.
- Assemble the exterior and lining shells.
- Make a structured interior insert and secure it with hook-and-loop tape.
Fabric and structure
The class uses sturdy canvas outside, insulated batting in the middle and waterproof nylon inside. Food-safe plastic is also discussed as a lining option.
A lighter outer fabric needs fusible interfacing for body. The project also uses plastic panels, strap padding, mesh, zippers and backpack webbing.
Make it your own
Place the small pocket on a side or on the front, and substitute coordinating fabric for its mesh section if preferred.
The lining may be waterproof fabric, food-safe plastic or coated fabric. Optional feet can be added to the base, and hook-and-loop tape can hold the interior insert in place.
For related formats, see the smaller insulated bag or the larger portable cooler.
The video class includes a printable PDF pattern covering the project pieces, materials and structural components.