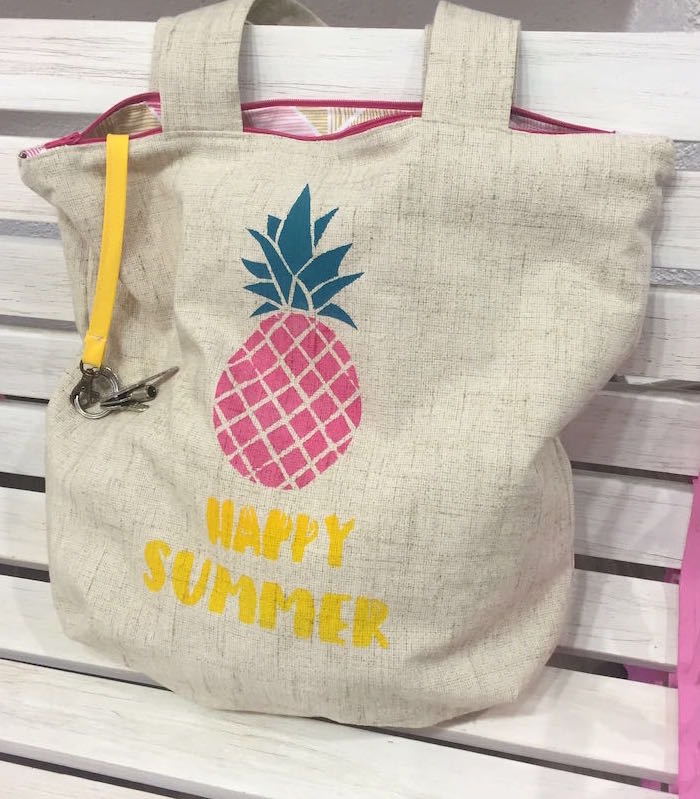
Have you seen the latest Lulu Ferris tutorial for making a summer bag? If you're not a member of Lulu Ferris and haven't seen it, we want to tell you about a material that absolutely belongs among your DIY basics: freezer paper, also called freezer paper in English. At a price anyone can afford, it will open up a world of color, personalization, and family crafts. You can get it in our shop for 0,50€.
Basically, we're going to use it to create templates that we can attach to fabric. Then, using the stencil technique and fabric paint, we'll transfer whatever drawing or design we like onto our fabric. It's a perfect technique to do with kids, who will have a great time decorating their own clothes. Keep reading and we'll tell you all about it!
What is freezer paper?As its name suggests, it's freezer paper. Or, to explain it better, it's the typical paper used in stores to wrap deli meats, butcher-shop products, fish, and so on. You know the kind, right? If you look closely, it has one matte side and one shiny side, which we can stick to the fabric and remove very easily once we've finished our work of art.
How do you use freezer paper? It's super easy! If you've ever used Heat and Bond to make appliqués, the process is very similar. You'll need something to draw with and a pencil-style craft knife for cutting. On the matte side of the paper, draw what you want to print on the fabric: a little heart, a star, some letters, a pineapple like ours…
Got it? Now cut out the shape you just drew with the craft knife. You'll end up with something like our Happy summer lettering. And now comes the most interesting part of freezer paper: place your template on the fabric, matte side facing up and shiny side touching the fabric. Once it's in the exact spot where the design will go, run the iron over it and you'll see how it sticks to the fabric.
Don't worry about removing it later—it comes off perfectly when you pull it.
Time to paint! Once the freezer-paper template is stuck to the fabric and you know it won't move, it's time to paint. You'll need fabric paint, a small sponge, and a container for the paint. Remember that you can mix colors to create new ones. Now all you have to do is soak the sponge in the paint and start painting, applying pressure with gentle dabs.
We recommend placing something underneath the fabric so you don't stain the surface below it. If it's a finished garment, such as a T-shirt, this is essential to avoid staining the back, for example.
Check the paint container for how long you need to let it dry, and once it's dry, you can remove the freezer paper. Just lift a corner and pull. Finally, to make the paint permanent and washable, you need to iron over it. The manufacturer's instructions will also tell you how long to leave the iron on it. Place a cloth over it for the best result.
And there you have it! Hasn't it made you think of a ton of things you could decorate? Take advantage of the warm weather and give your clothes and accessories a radical summer makeover.
To see the complete tutorial for our summer bag with this beautiful pineapple-shaped stencil, join Lulu Ferris and you'll also get 5% off all products in the shop. Come on, there are already lots of us—we're waiting for you!