

Needles aren’t the only things that get lost in haystacks; pins have their own problems, too. Leaving them in the little boxes they come in when you buy them usually isn’t a very good idea, because it’s quite difficult to pick them up one at a time. That is, if you don’t prick yourself, since anything can happen. However, having a pincushion close at hand is one of those little details you don’t appreciate until you have it. So today we’re going to show you 3 super-easy techniques for making a DIY pincushion, with or without a sewing machine.
Some are so simple that you can make them as a craft project with little ones using fabric glue. Others, like the hedgehog one we posted to Lulu Ferris last Friday, require a little more work, but can even be used as a stuffed toy.
Choose the one you like best, find a fabric you love, and get started.
3 ways to make a DIY pincushion
 1. Hedgehog pincushion with a magnet
Although it’s the most “complicated” of the four models, it’s still very easy to make. This pincushion has two strong points:
- It has a built-in magnet. That way, you can pick up pins that have scattered across the table without trying to grab them with your fingernails. You can also “stick” it to your sewing machine so it’s always close at hand.
- The design is so beautiful and adorable that you can give it other uses if you leave out the magnet. I’m sure a few members of the family would be delighted to use it as a toy: children, dogs, and kittens included.
Here’s the link to the hedgehog pincushion tutorial.
 2. Wrist pincushion
With this one, you’ll always have your pins close at hand—just like seamstresses and tailors of old. This one doesn’t require a sewing machine and is probably the simplest of them all.
It’s also a perfect way to recycle fabric scraps left over from other projects, and with very little, they turn out truly beautiful, as you can see in the photograph.
You can find the tutorial for making the DIY wrist pincushion on our YouTube channel.
You’ll have it ready in just 5 minutes!
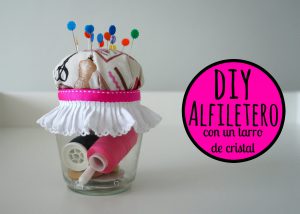
3. Pincushion with a glass jar
An idea we found online and loved. It also gives those of you who regularly follow us and already know our work a chance to see something new :)
In this 6-minute tutorial from Pinafili Films, you can see step by step how to prepare the jar lid and turn it into a pincushion that can also be used to store other sewing supplies.
Threads, needles, buttons, ribbon… The great thing about this model is that it’s practical for storing other little things and decorative, too.
Which one will you choose?