
Zippered Key Pouch with Carabiner
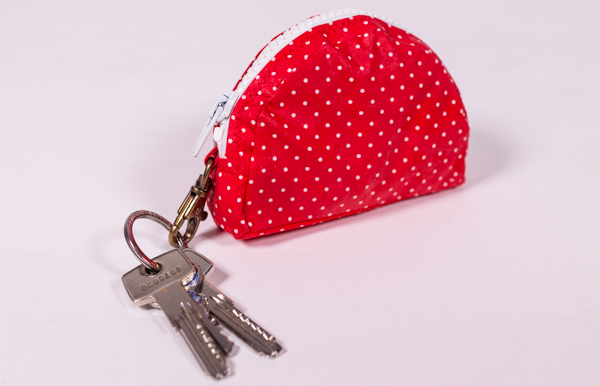
Learn how to sew a zippered key pouch with two handy functions: (1) keeping your keys close at hand and (2) preventing them from damaging everything you carry in your bag.
Video class
This video is for members
Join Lulu Ferris to watch the complete class and sew along at your own pace.
What you’ll make
Sew a compact zippered pouch that keeps a bunch of keys contained inside your bag. A reinforced fabric tab and carabiner keep the keys attached to the pouch.
The enclosed design helps keep loose keys from scratching or damaging nearby items. Leave off the fabric tab and carabiner if you would rather use the project as a small coin purse.
What you’ll learn in this class
- Create a clean inset opening for a zipper.
- Shorten a molded zipper and finish its cut end.
- Secure the zipper with a tested zigzag stitch.
- Make and reinforce a narrow fabric attachment tab.
- Join shaped pouch sections around curved edges.
- Attach a carabiner securely to the finished tab.
Choosing your fabric
Use a structured fabric, such as canvas, or a fabric treated to add body and water resistance. A regular fabric can be strengthened with interfacing.
The pouch is unlined, so any interfacing added to the fabric will remain visible inside. A ready-made bias strip can replace the self-fabric tab when extra firmness is useful.
Make it your own
This small project is suited to using a sturdy leftover piece. The sample reuses treated fabric from the Edward Belt Bag.
Choose a prominent zipper for contrast, adjust the tab to your carabiner, or omit the key hardware to turn the same shape into a coin pouch.
The video class includes a printable pattern for the shaped center, base, and zipper pieces, with material guidance for the zipper and carabiner.