
Car Seat Organizer
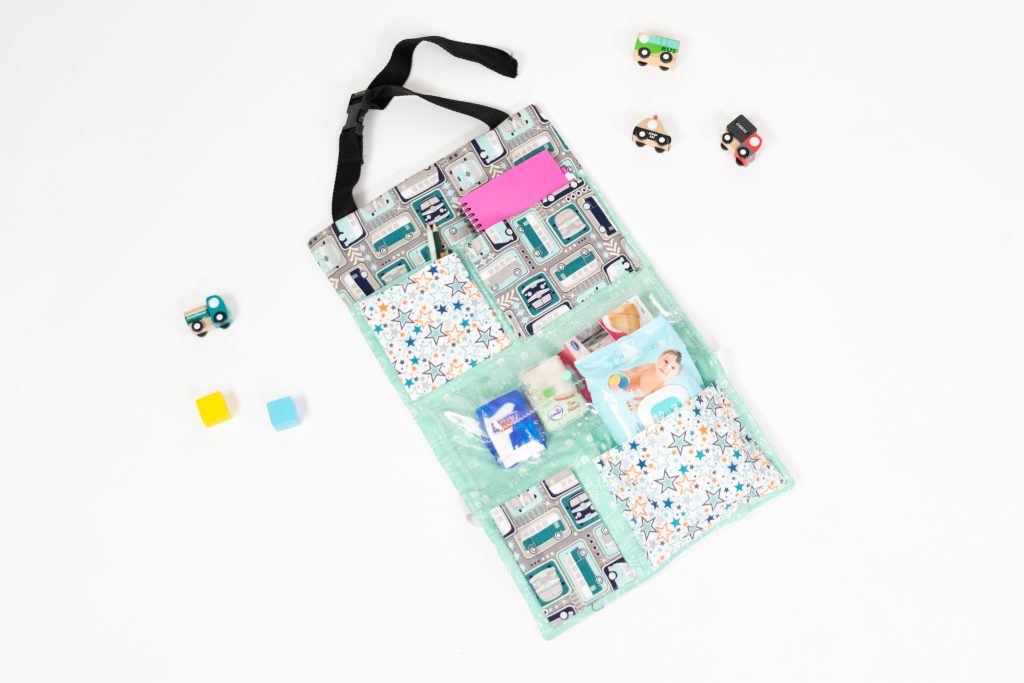
This car seat organizer will look perfect in any corner of your home, too. It’s very practical and features a removable clear vinyl pocket.
Project preview
This video is for members
Join Lulu Ferris to watch the complete class and sew along at your own pace.
What you’ll make
Sew a padded organizer that hangs from a car seat with an adjustable headrest strap and an elastic lower band.
Four fabric pockets hold travel essentials such as a bottle, wipes, glasses, toys, or a book. A removable clear-vinyl pouch keeps its contents visible and separate.
The design can also be adapted for a crib, bathroom door, or another place where hanging storage is useful.
What you’ll learn in this class
- Interface pockets and press shallow side gussets.
- Sew several pockets onto a padded base.
- Construct a removable vinyl pouch with a flap.
- Help vinyl feed with a walking foot or paper.
- Attach hook-and-loop tape.
- Enclose webbing and elastic between layers.
- Add an adjustable buckle and close the opening.
Fabric and materials
The organizer combines exterior fabrics with interfacing for the pockets and batting for the main body. The removable pouch uses clear vinyl intended for sewing.
You will also need hook-and-loop tape, elastic, polypropylene webbing, a backpack-style buckle, and an optional snap.
A walking foot helps feed the layered fabric and vinyl. If the vinyl sticks under the presser foot, the class demonstrates sewing over paper.
Make it your own
Mix coordinating fabrics or use one fabric throughout. Adapt the number and width of the pockets to the items you usually carry.
The clear pouch can be removed and carried separately. Leave its flap as demonstrated or add a closure.
The class adds an extra upper strip during construction. Watch the complete lesson and compare the plan with your intended seat before cutting or changing the layout.
Fit and verified measurements
The PDF uses a 52 × 37 cm main front piece, a 60 × 37 cm back piece, and an additional 10 × 37 cm upper piece.
The clear-vinyl pouch is cut from a 22 × 32 cm piece and measures 13 cm high once folded.
Car seats may differ. Measure the intended seat and headrest, then adjust the organizer, webbing, or pocket arrangement if needed.
The class includes one video lesson and a downloadable PDF with numbered pieces, measurements, and materials.